OpenSwitch installation guide and useful tips.
Installing OpenSwitch
1. Download the ISO image from the provided link.
2. Copy the ISO image to a USB thumb device.
3. Connect a USB thumb device to the front panel USB port.
4. Connect to the switch via serial console using standard settings:
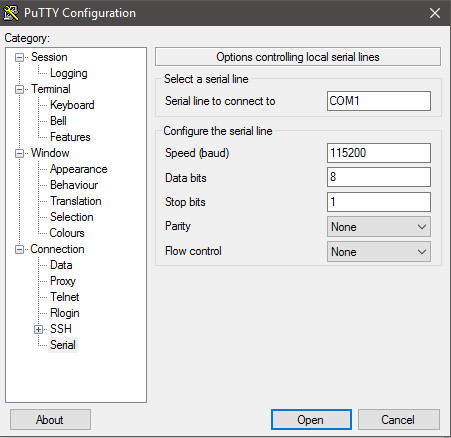
WARNING: Do not use a USB-mini USB cable, it will damage the console port on the switch.
Use the enclosed mini USB-serial cable.
5. Reboot and configure the switch into the ONIE Rescue mode.
6. Pick the partition that has the flash drive inserted (/dev/sdb1 in this case) and mounts it:
ONIE:/ # mkdir /mnt/usb_drive_mount_point
ONIE:/# mount /dev/sdb1 /mnt/usb_drive_mount_point
7. Run the installer:
ONIE:/onie-nos-install # ./onie-installer-x86_64-ops-2.0.0

......

--- Installing OpenSwitch GRUB ---
Installation finished. No error reported.

OpenSwitch installation completed

Rebooting...
8. Once the switch is rebooted, login as root (default credentials are admin/admin) and check the version. It should match with the one that was installed.
To access the CLI use the “vtysh” command.
admin@switch:~# sudo -i
root@switch:~# vtysh
switch# show version
2.0.0
switch#
9. For the documentation please refer to this page.
10. To fill the secondary image partition, please run the installer once more.
11. To activate the web UI, you need to activate REST API daemon first.
admin@switch:~# sudo -i
root@switch:~# systemctl enable restd
root@switch:~# systemctl start restd
Web UI IP address is the same as the management port address.
Default credentials are “netop/netop.”
12. REST API
REST API documentation: https://management_interface_ip_address-or-switch_name/api/index.html
Updating OpenSwitch
The update procedure is standard for a Linux package:
1. Download the package to the switch.
2. Use the command “dpkg -i ops_package_2.0.X_amd64.deb”